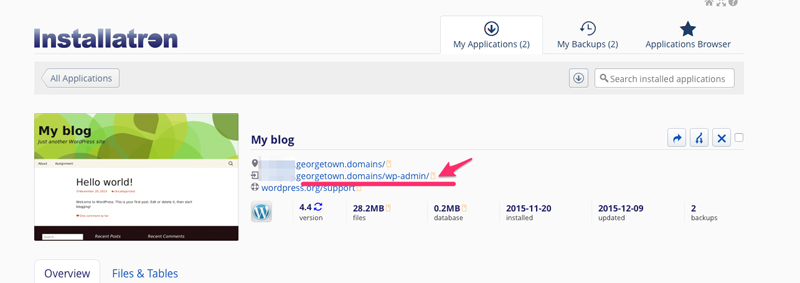
Before you find the Dashboard of WordPress, let’s first have a look at the organization of Domain of One’s Own. After you log in to Georgetown’s Domain of One’s Own, you will be on the Dashboard of Domain of One’s Own. You will need to open WordPress in “My applications”, and find the Dashboard of WordPress there.
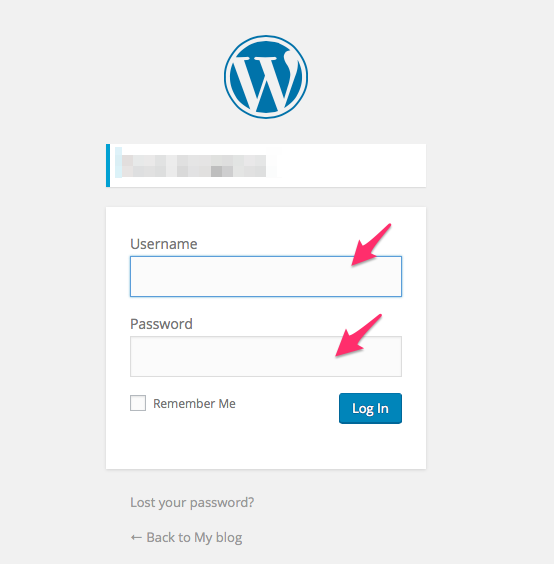
Either follow the link to your dashboard from the WordPress web application page in your Domain Dashboard, or add “/wp-admin” after your domain URL to get to the login screen. Log in to your website using the username and the password you set for your website.
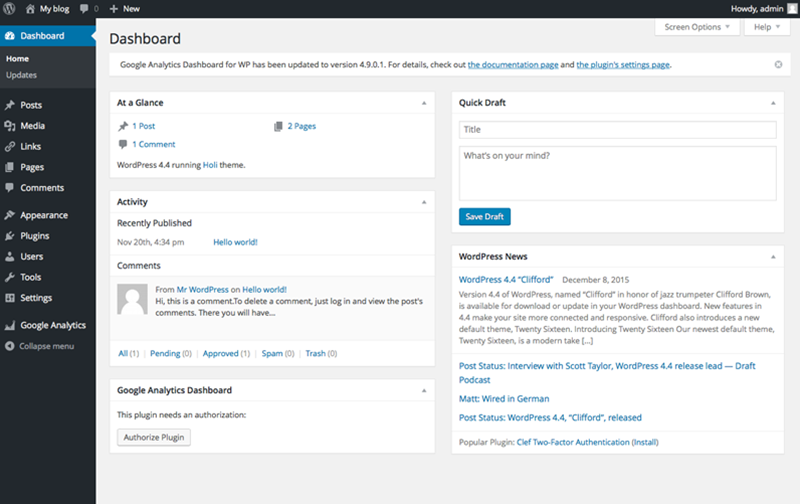
The left sidebar includes access to all the different functions you need to manage your WordPress site, including adding new Posts, Media, Links, Pages, Comments; change themes and appearance; add/change users; and privatize settings. Now let’s learn about them one by one.
General Settings
- Site Title and Tagline
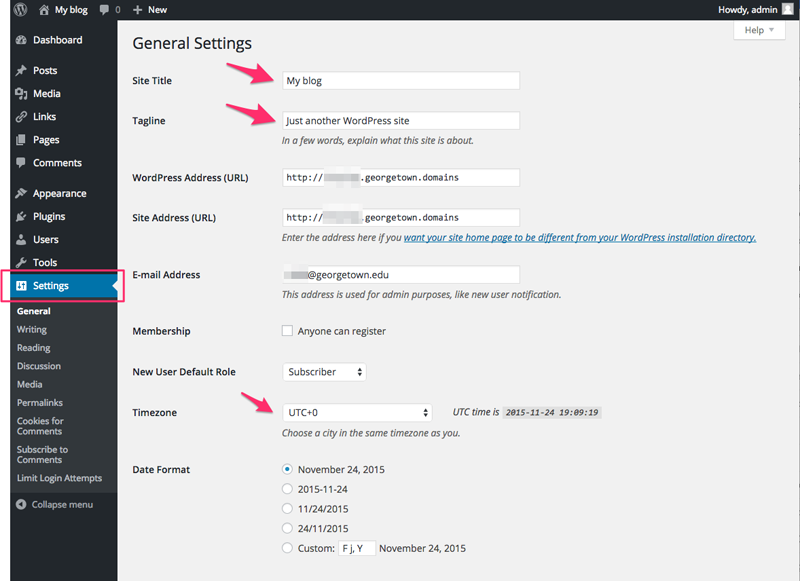
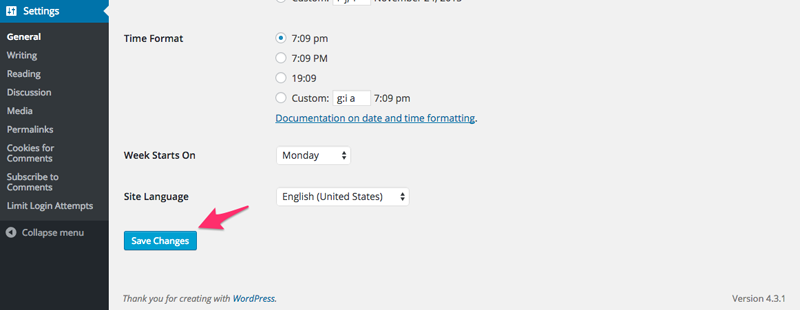
Firstly, go to “Settings” on the left sidebar. Now you see in General Settings, you can change the “Site Title”, and the “Tagline” on this page. - TimeZone
The default TimeZone by WordPress is UTC+0. Change it to “New York” if you are on the Georgetown campus.
Please do not forget to “Save Changes”.
Read Settings
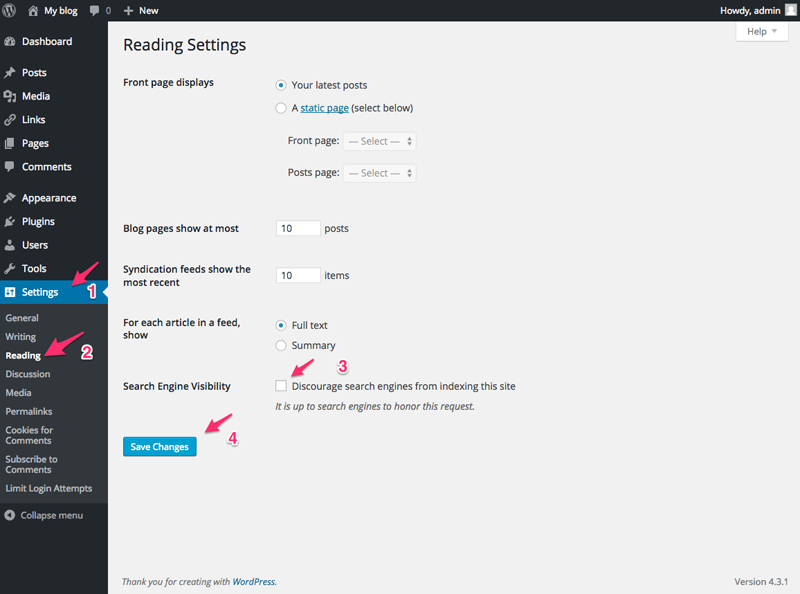
The website you created will be public. However, you have the option to disable the website from being searched by the search engine.
Go to “Read Settings” under “Settings” in the left sidebar. Change the “Search Engine Visibility” by clicking the checkbox, and discourage search engine from indexing this site. Finally, do not forget to “Save changes”.
Users
- Your Profile
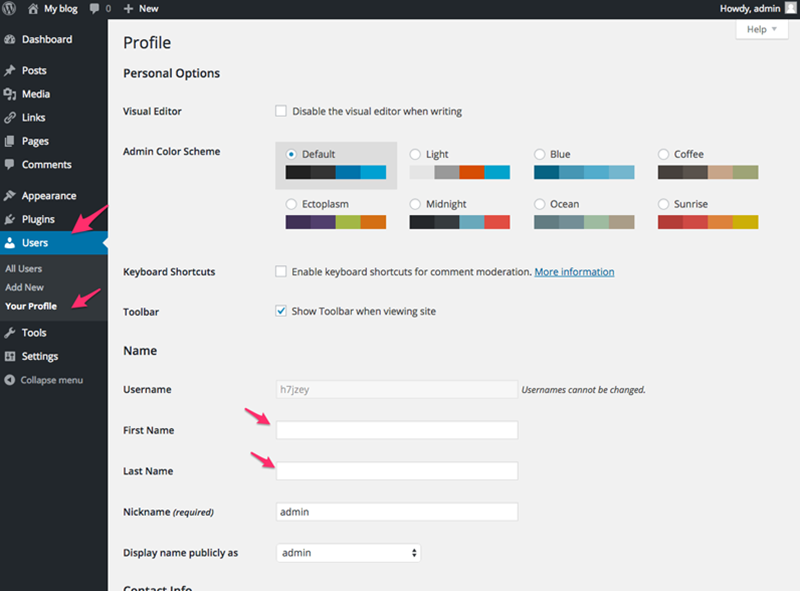
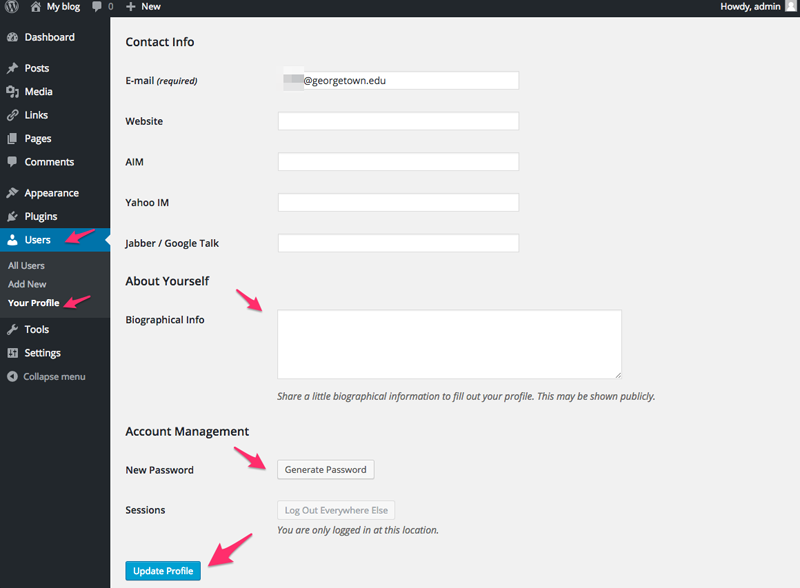
You can customize your profile in the “Users” section. For example, to add biography, change password etc., go to “Users” → “Your Profile” on the left sidebar. Here you can see options to add your First and Last name, add biography, and change your password. Please do not forget to click the blue button “Update Profile” after changing anything.
Appearance
- Choosing a theme
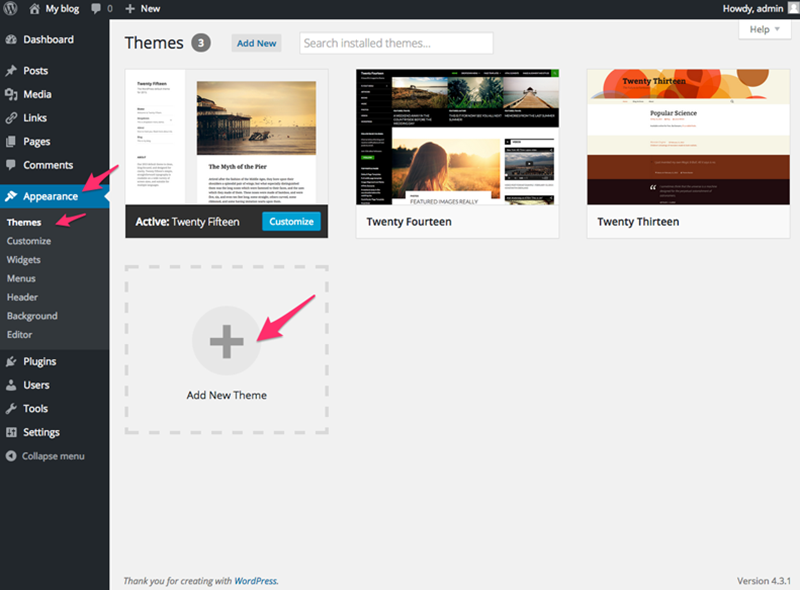
You can customize the theme for your website. Go to “Appearance” → “Themes” in the left sidebar. The default WordPress theme is Twenty-Fifteen.
When you first view the Themes screen, you’ll see three featured themes. Click on the theme badge for details about it and a preview of how it looks. If you need more options, click “Add New Themes”, then you’ll be able to choose from the 100 most popular or most recent WordPress themes. Feature Filter allows you to search based on a checkbox of features you’re looking for.
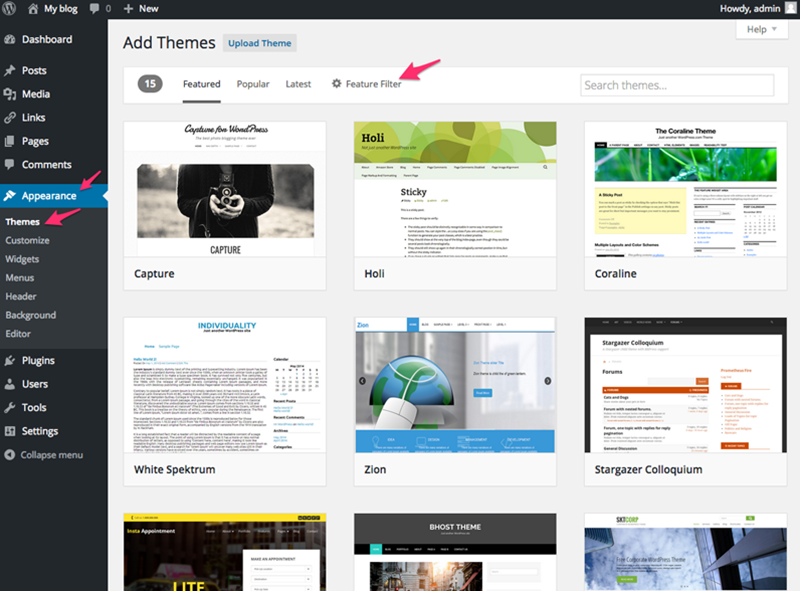
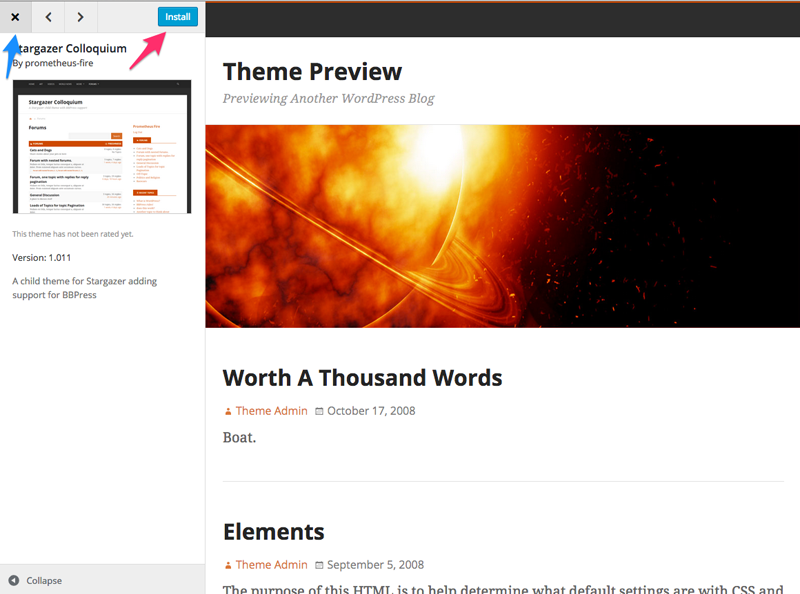
If you are considering using one theme, you can click the Theme that you would like to preview, and you will be on the preview page. Check if you are happy with this theme; if yes, just click Install to install it into your Theme menu. Then Activate it to make it the theme that is currently running your site. If not, you can repeat the step and check other themes.
Adding Pages
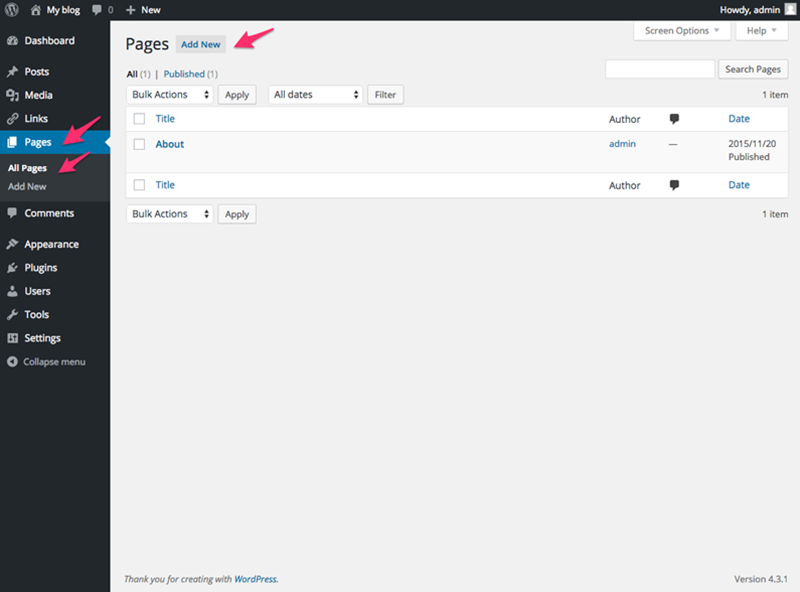
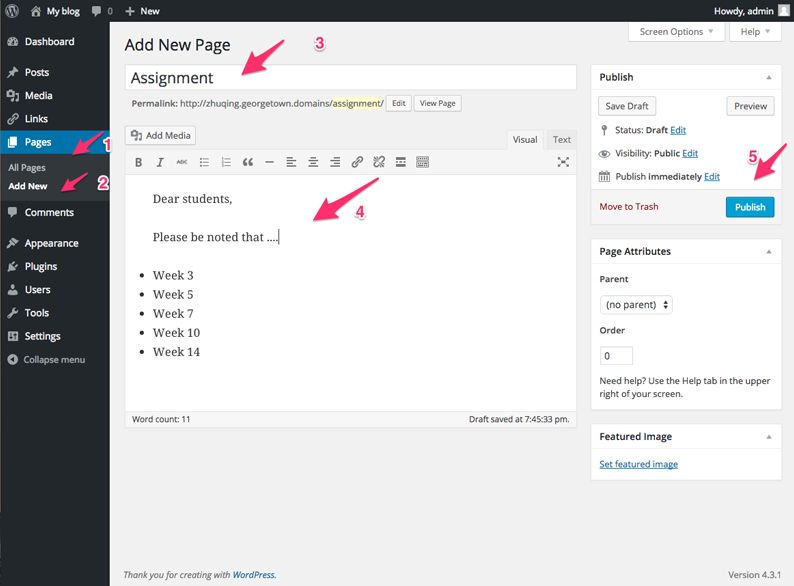
You can add a tab on the navigation bar on your website by adding a new page. Go to “Pages” in the left sidebar. Here you see the default page “About”. You can add more pages, and they will appear on the navigation bar on your website. Let’s add a page named “Assignment.” Click “Add New.”
Give a name for your page. This will appear on your website navigation bar. Add the content, for example, the assignment data, in the text section. Then, click “Publish” after you are done with the content. You can always come back to add/change the content later.
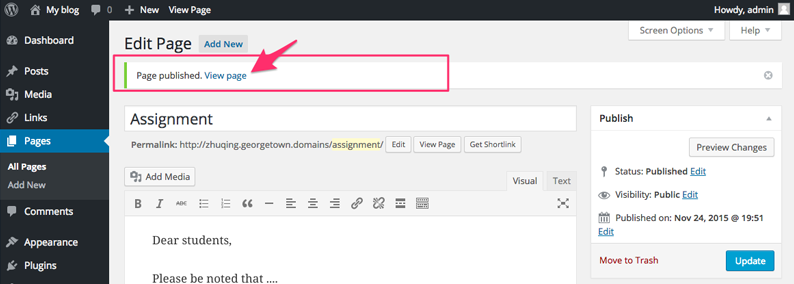
After clicking “Publish”, you will see this green bar message on the top of the page. Click “View page”.
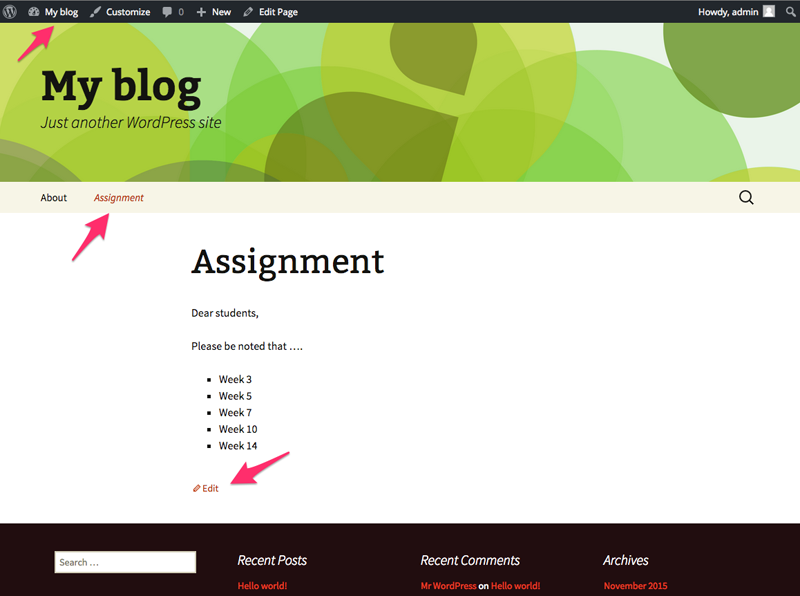
After going to your website, you can see “Assignment” is added to your navigation bar as a tab. You can edit the content on this page by clicking “edit”, or click “My Blog” -> “Dashboard” on the top bar to go back to your WordPress Dashboard.
To learn Advanced Settings of WordPress, click below.
Advanced Settings of WordPress


